
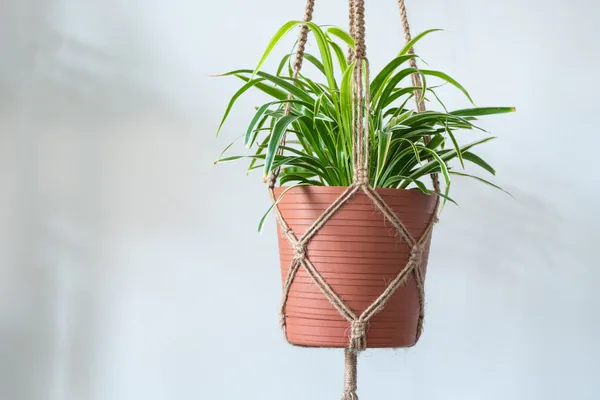
If you are looking for a houseplant that is forgiving, attractive, and surprisingly versatile, the spider plant (Chlorophytum comosum) deserves a prominent spot in your home. With its arching green-and-white striped leaves and cascading baby plants, it adds a lively, natural touch to any room without demanding much in return.
This guide covers everything a beginner needs to know — from the real benefits of keeping a spider plant to a simple, practical routine for growing it successfully indoors. Whether this is your first houseplant or a welcome addition to an existing collection, the spider plant is one of the most rewarding choices you can make.
Why Spider Plants Are So Popular Indoors
Spider plants have been a household staple for decades, and for good reason. They tolerate a wide range of conditions, recover quickly from neglect, and keep producing cheerful plantlets — small rosettes that dangle from long arching runners like tiny versions of the parent plant.
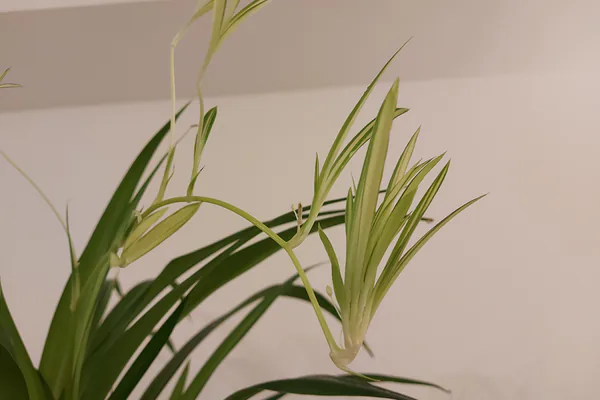
Native to tropical and southern Africa, Chlorophytum comosum adapts well to life indoors. The most popular variety features long, narrow leaves with a creamy white center stripe and green edges. It grows in a rosette shape and looks equally good in a hanging basket, on a high shelf, or along a windowsill. Its cascading form brings a sense of natural movement to otherwise static spaces.
Key Benefits of Growing a Spider Plant
Spider plants offer more than visual appeal. Here are the core reasons gardeners and interior decorators alike continue to reach for this variety:
- Exceptionally easy to grow. Spider plants tolerate low light, irregular watering, and a range of temperatures. They are ideal for beginners still building their plant care confidence.
- Fast-growing and rewarding. Under reasonable conditions, a spider plant fills out quickly and begins producing runners with plantlets within a few months.
- Effortless to propagate. Each baby plant can become a new, independent plant with minimal effort, making it easy to expand your indoor garden or share with others.
- Visually refreshing indoors. The arching foliage and trailing runners bring movement, color contrast, and a calming green presence to shelves, desks, and corners.
- Generally safe around pets. Unlike many popular houseplants, spider plants are widely considered non-toxic to cats and dogs, though mild stomach upset is possible if eaten in large amounts.
- Excellent long-term value. One plant can produce dozens of babies over several seasons, giving you a strong return on a modest initial investment.
Best Conditions for Healthy Spider Plant Growth
Light Requirements
Spider plants prefer bright, indirect light. A spot near a north- or east-facing window is ideal. They can handle lower light levels, but their characteristic leaf variegation may fade over time without adequate brightness. Avoid direct midday sun, which can scorch and brown the leaf tips.
Temperature and Humidity
They thrive between 60°F and 80°F (15°C–27°C), which aligns comfortably with typical indoor conditions. Average household humidity is usually sufficient, though a light misting during dry winters can help. Keep plants away from cold drafts, air conditioning vents, and heating sources that dry the air rapidly.
Placement Ideas
- Hanging baskets: the best way to show off long, trailing runners and plantlets.
- High shelves: runners cascade attractively downward without crowding nearby surfaces.
- Tabletops or desks: a compact pot works well in smaller spaces or home offices.
A Simple Watering and Soil Routine
How Often to Water
Water your spider plant when the top inch of soil feels dry to the touch. In spring and summer, this typically means once or twice a week. In autumn and winter, reduce frequency as growth slows. Overwatering is the most common cause of root rot, so always check the soil before adding water rather than following a rigid schedule.
Choosing the Right Soil
Use a well-draining potting mix — a general-purpose blend with added perlite works well. Always choose a pot with drainage holes at the bottom. Spider plants are sensitive to fluoride and chlorine found in some tap water; if brown tips appear despite good care, switching to filtered or collected rainwater often resolves the issue.
How to Feed, Prune, and Repot a Spider Plant
Feeding Schedule
Apply a balanced liquid fertilizer once a month during spring and summer. Avoid over-fertilizing — too much nitrogen accelerates leaf tip burn and can stress the roots. Skip feeding entirely in autumn and winter when the plant is resting.
Pruning for Tidiness
Trim brown or yellowed tips with clean scissors to keep the plant looking neat. Remove old or spent runners once their plantlets have been harvested. Regular light pruning encourages the plant to direct energy into producing fresh, healthy foliage rather than maintaining damaged growth.
When to Repot
Repot every one to two years, or when roots begin to circle the base of the pot or push through drainage holes. Move up by one pot size at a time, using fresh potting mix. Repotting in spring gives the plant the whole growing season to settle into its new container.
How to Propagate Spider Plant Babies
Propagating spider plants is one of the most satisfying parts of owning one. The process is beginner-friendly and has a very high success rate:
- Wait for plantlets to mature. Once a spider plant is well established, it produces long runners with small rosettes at the tips. Let them develop until each plantlet has a few leaves and visible root nubs.
- Propagate in water. Cut the runner close to the plantlet and set it in a small jar of clean water. Roots typically develop within one to two weeks. Transfer to moist potting soil once roots are about one inch long.
- Propagate directly in soil. Pin the runner down onto the surface of a small pot filled with moist potting mix, without cutting it from the parent. Once rooted, sever the runner. This method often produces a stronger plant more quickly.
Water propagation lets you observe root development, which is satisfying and educational. Direct soil propagation tends to create a more robust root system from the start. Both approaches work reliably.
Common Spider Plant Problems and Easy Fixes
Brown Leaf Tips
The most frequently reported issue. Causes include fluoride or chlorine in tap water, low ambient humidity, excess fertilizer, or inconsistent watering. Try filtered water, reduce fertilizer frequency, and mist the plant lightly during very dry periods.
Yellow Leaves
Usually a sign of overwatering or compacted, poorly draining soil. Allow the soil to dry out more thoroughly between waterings and verify that the pot drains freely after each session.
Pale or Washed-Out Foliage
Insufficient light reduces the contrast of the leaf variegation and causes overall pallor. Move the plant gradually closer to a brighter window, avoiding sudden exposure to direct sun.
Pests
Spider mites, aphids, and mealybugs occasionally appear, especially in dry conditions. Wipe leaves with a damp cloth, rinse under lukewarm water, or apply a diluted neem oil spray for persistent infestations. Catching problems early makes treatment straightforward.
Spider Plant Care at a Glance
- Light: Bright, indirect light; tolerates low light conditions
- Watering: When the top inch of soil is dry
- Soil: Well-draining mix with added perlite
- Temperature: 60°F–80°F (15°C–27°C)
- Fertilizer: Once monthly in spring and summer only
- Repotting: Every 1–2 years or when visibly rootbound
- Propagation: Plantlets rooted in water or directly in soil
- Pet safety: Generally non-toxic to cats and dogs
Spider plants are one of those rare houseplants that reward patience and simplicity. Once you understand their basic preferences — filtered light, moderate watering, and good drainage — they grow steadily and repay your care with an ever-expanding cascade of cheerful plantlets ready to be shared or replanted. For beginners setting up their first indoor garden, or experienced plant owners seeking a reliable and visually engaging addition, the spider plant remains one of the best choices available.